Object 1
I thought the tutorial was daunting when I attempted it in class. Once I gave it a shot on my own, the shape was much easier to build. A big part of the learning process here, for me, was familiarizing the buttons and features within FreeCAD. The assignment itself was not difficult; however, learning a new piece of software was. After all the difficulties I encountered throughout this assignment, I became more confident with the different features. This assignment did take me about an hour or so to get the essential functions down. Overall, however, the tutorial was self-explanatory, and I did not need the added help of watching the YouTube videos.

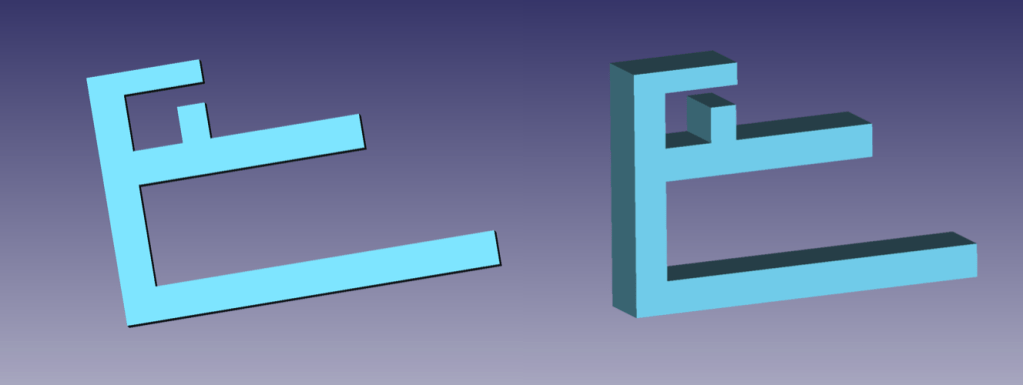
Object 2
With its simple design, Object 2 was easy to accomplish. I brainstormed a couple of ideas; however, for my experience, I went with this concept. The previous object made this much easier to make. Another reason I chose this design was that the software kept crashing. This could be due to my parents’ minimal wifi. I was also limited in other places I could go to work on this assignment. Regardless, I was satisfied with the result. One addition I wish I could have pulled off would have been to incorporate a binder-clip-like effect, where the user could squeeze two prongs. It could then be adjustable to many different types of desks.

I started with the main backbone that would hold the other bars. I ensured I kept up with the measurements so I could record what desks this device would be compatible with. I then proceeded to add the two primary prongs that would secure the object to a desk. Since the bottom prong is longer, it weighs down the entire object and allows it to be compatible with more than just 3 inch desks. Finally, I added the top sections that would hold the cords. Initially the 8mm piece was on the roof of this section. While creating the object, I realized this was a design flaw and changed it to fit on the bottom, creating a ‘G’ shape. This ensured the cords would not slip out. While creating this object I became more fluid with the program and found out more features, like changing the color.

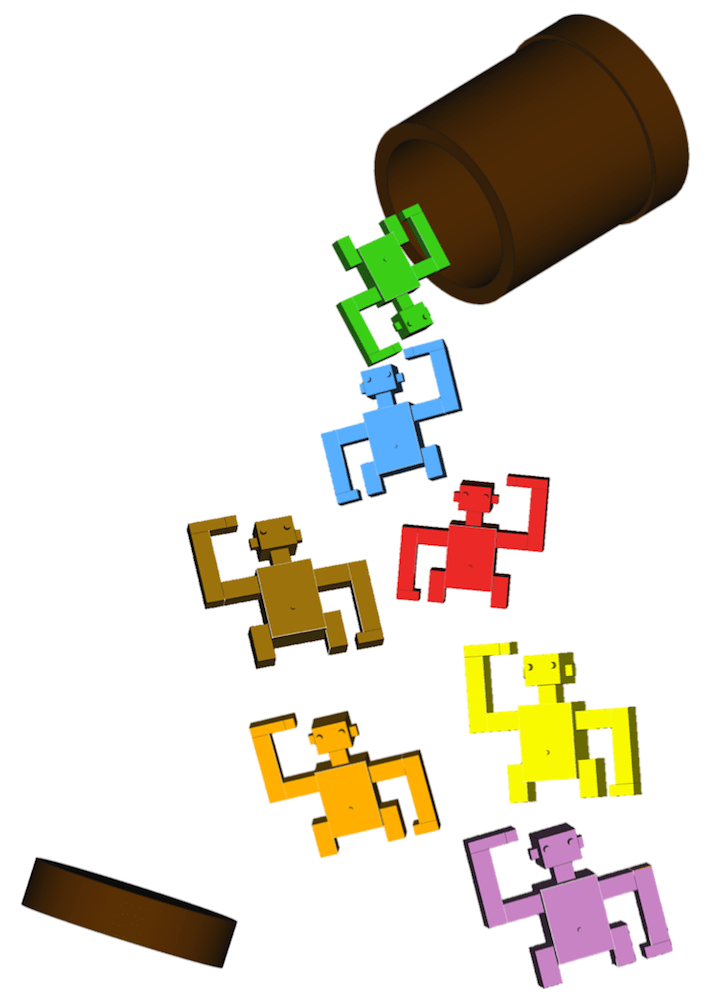
Object 3
I had many ideas for Object 3. For example, a pair of hands that could hold each other, an artistic puzzle that would fit together, puzzle pieces, and monkeys in a barrel. The first two ideas seemed a bit advanced for my current skillset in FreeCAD. The puzzle pieces, however, seemed too easy. Therefore I thought the concept of monkeys in a barrel would work the best for this assignment.


I began Object 3 with the torso. I tried using a sphere and cylinder to create the body and head. This proved futile. I wish I could have made the monkey more smooth and less robotic. Due to the program crashing, and little tutorials online for animal creations, I decided to stay with the boxes. I liked how they turned out, but I still strived for perfection. I stumbled upon the option to upload a dxf file. I searched for a free file of a monkey but no luck. I continued onward with the arms and legs. I ensured that all body parts were lined up and the same dimension so the monkey would be proportionate. During this assignment, I learned to play with the hollow tool (for the barrel) and the height of specific details for the eyes, belly button, and hands. One feature I was confused about during the finishing touches of Object 3 was refining the monkey. I tried and tried to refine him so there would be no lines, but the whole object would disappear. Even when I went through and individually made each part “true” for refine, I still got no results. I searched Google and tried different options but in the end, I could not successfully refine it.